Showing posts with label EQ7. Show all posts

Tuesday, October 13, 2015

EQ7 Tips and Tricks - Swap All Colors and Spraycan

(This tip is part of a growing EQ tutorial series, you can find all of my EQ Tips and Tricks right here.)


Welcome back for another EQ7 Tips and Tricks Tutorial.  I am first going to show you one of my most favorite tools in EQ7, the "Swap All Colors" button.


You can design quilts in many other programs like Power Point, Abobe Illustrator, Corel Draw, and others, but I have not found another program that allows for such quick and easy switching of colors and prints in a quilt rendering.

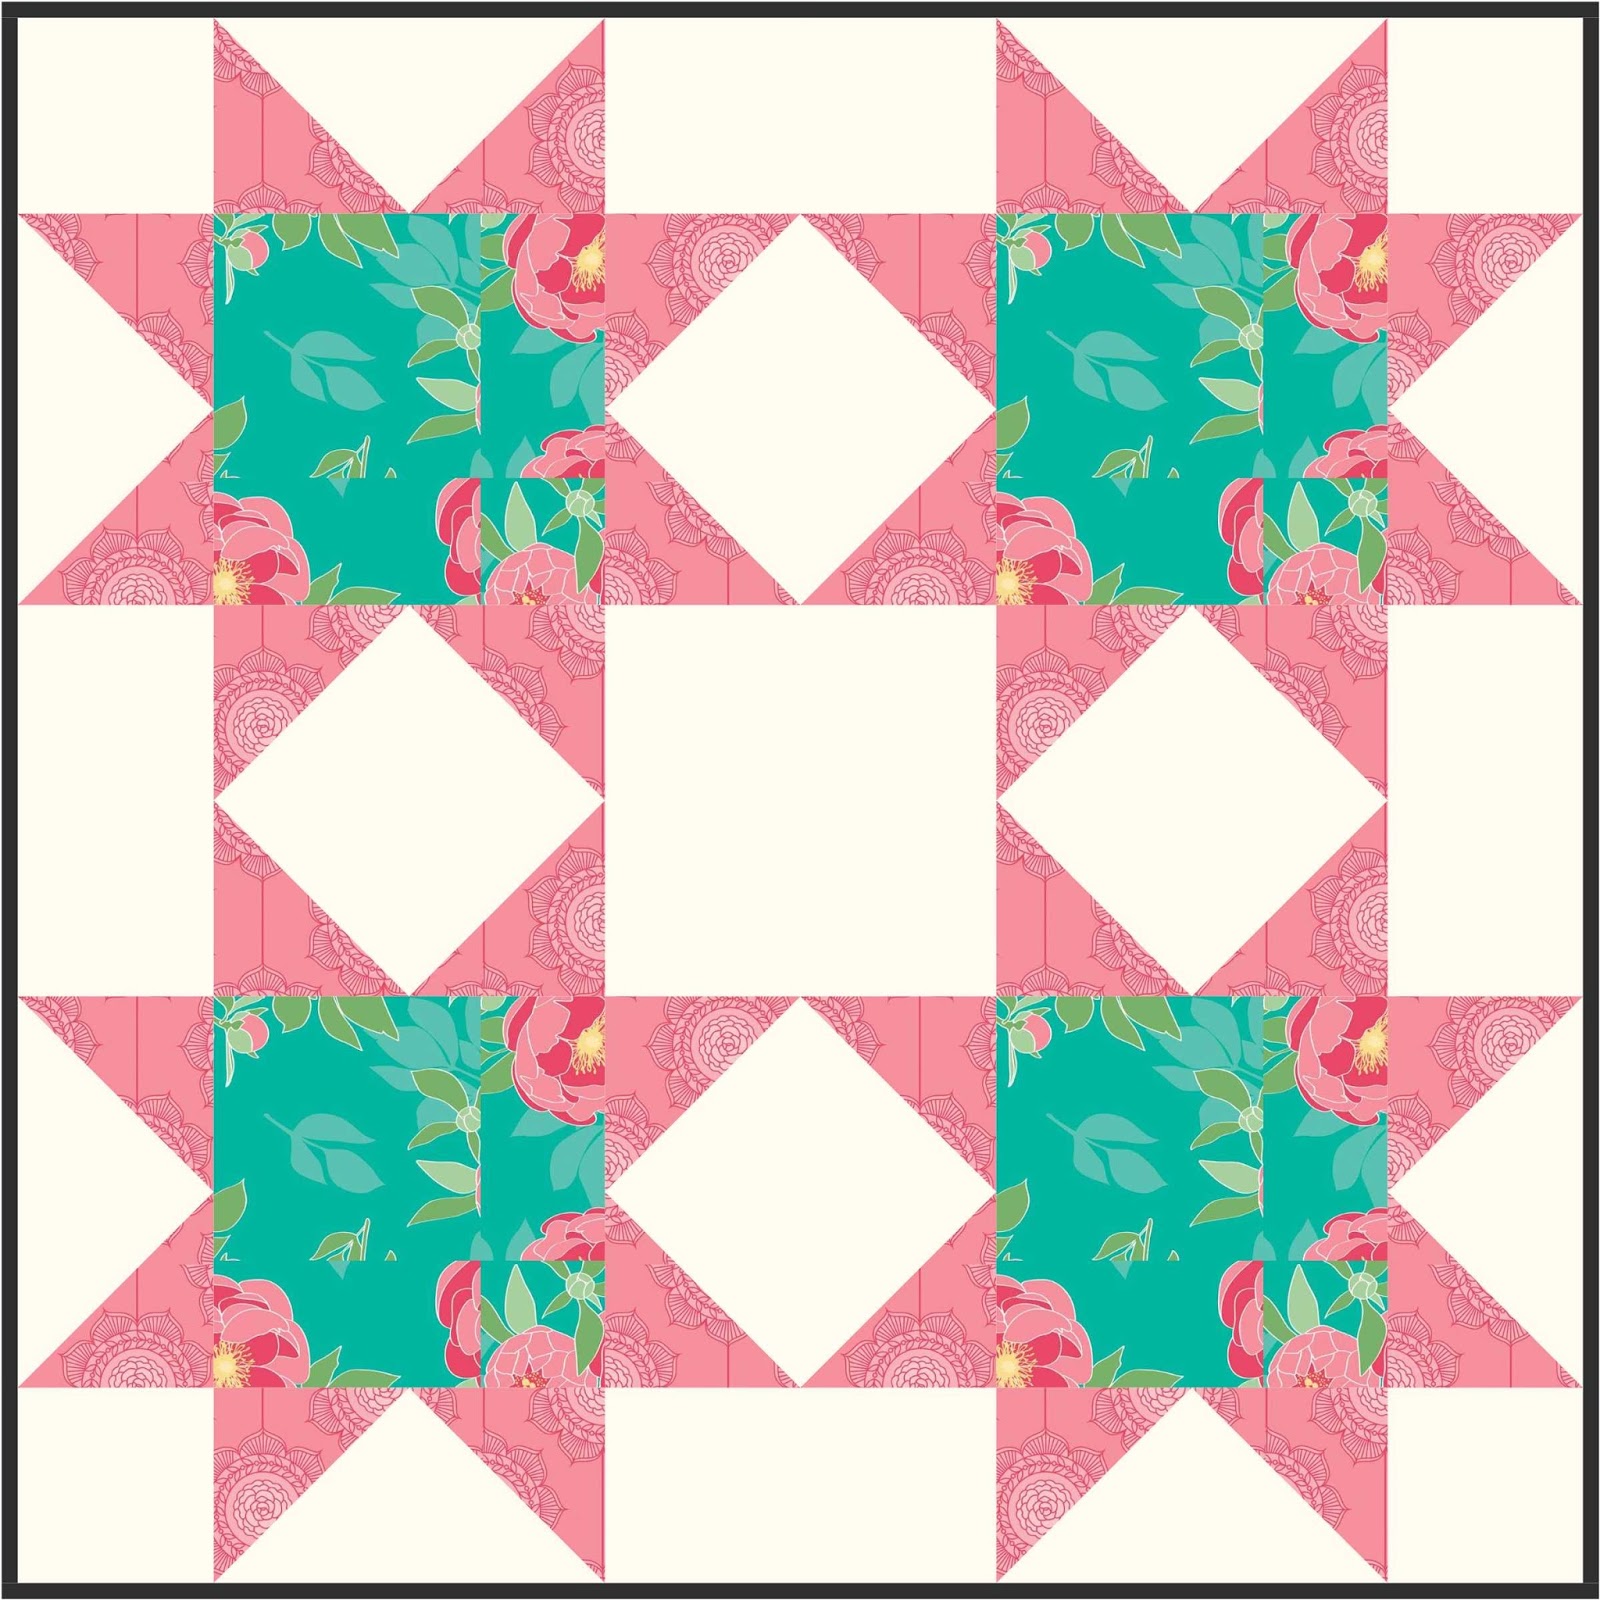
Here is our test quilt for today made up of a repeating chain block from EQ's block library in the original EQ provided colors.


Not bad, but I think that some of the pattern is lost because the 3 colors have lower contrast compared to each other.

To change all of one color within a quilt to another color:

1.  Select the "Swap All Colors" button on the right hand side of the screen.
2.  Select the color or fabric you would like to use.
3.  Click in the quilt on the color you would like to replace.  

The color within the quilt you click on will switch to the new color throughout the entire quilt.


With just a few clicks you have a whole different looking quilt and you can easily and quickly audition many colors and fabrics in your designs.


The next button to show is the Spraycan button which is the button right above the Swap All Colors button.  It works the same as the Swap All Colors button, but swaps the colors within a single block.


To change all of one color within a single quilt block to another color:

1.  Select the "Spraycan" button on the right hand side of the screen.
2.  Select the color or fabric you would like to use.
3.  Click in the quilt on the color you would like to replace.  

The color within the quilt block you click on will switch to the new color throughout the quilt block.


With a few clicks of the Spraycan button, I recolored the quilt blocks using a variety of April Showers by Bonnie and Camille prints.


I hope that you find these tutorials clear and helpful!  Let me know if you have any topics you would like me to cover.

I am very happy to link up with Let's Bee Social @ Sew Fresh QuiltsNeedle and Thread Thursday @ My Quilt InfatuationWIP Wednesday @ Freshly Pieced, and Tips and Tutorials Tuesday @ Late Night Quilter.


Tuesday, September 22, 2015

EQ7 Tips and Tricks - Fussy Cutting


Welcome back for another EQ7 Tips and Tricks Tutorial.  Today I am going to show you how easy it is to move your fabric images around on your blocks to mimic fussy cutting your fabric.

(This tip is part of a growing EQ tutorial series, you can find all of my EQ Tips and Tricks right here.)

Here is our test quilt, a simple star quilt using fabrics from The Cottage Garden collection by the Quilted Fish for Riley Blake.  The middle turquoise fabric has a wonderful large scale print which is chopped up and lost in this version.


To "fussy cut" the fabrics, you need to first add the Fussy Cut button on the right hand side of your screen.

1.  To add the Fussy Cut button:

a)  Click the "Customize Toolbar" button, which is the button at the bottom of the column of buttons on the right hand side of your screen.


b)  This will bring up a box with some options, click on "Add/Remove Buttons...".

c)  A listing of buttons will show up and the Fussy Cut button will be about three-quarters of the way down the list.  Click the button or the words and a check mark should show up to the left of the button.  You now should have the button installed :)


2.  To Fussy Cut in EQ7

a)  You are now ready to fussy cut.  Select the fussy cut button on the right side of the screen (that you just added).

b)  Click and hold the mouse button on the fabric image within the block piece you would like to move relative to the block.

c)  Move your mouse and the fabric will move with it.  When you are satisfied with the fabric design placement within the block piece, release the mouse button.

Here is our block with some fussy cutting ... much nicer!


I hope that you find these tutorials clear and helpful!  Let me know if you have any topics you would like me to cover.

I am very happy to link up with Let's Bee Social @ Sew Fresh QuiltsNeedle and Thread Thursday @ My Quilt Infatuation, WIP Wednesday @ Freshly Pieced, and Tips and Tutorials Tuesday @ Late Night Quilter.


Tuesday, August 18, 2015

Tutorial - How to Rescale Fabrics in EQ7


I'm back with another tutorial for EQ7!  This month's tutorial is all about getting the images of the fabric designs to appear the correct size relative to the block and the quilt within EQ7.

(You can find my first EQ7 tutorial on using the program to design triangle quilts here,  I am hoping to make this a monthly EQ7 tutorial post so if you have any questions on using EQ7 or suggestions for tutorials you would like to see, please leave me a comment or send me an e-mail.)

When using EQ7's built in fabrics, purchased fabric image collections from EQ7, or downloadable fabric image collections from fabric manufacturers, the fabric images tend to scale pretty well in EQ7 digital quilts.  However, if you are designing a quilt and use a saved image of a fabric (from a store you purchased the fabric from or a picture you take of the fabric), the scale can be very off making the print of the fabric very small, distorted, and difficult to see.  

Here is an example of a classic bear claw block quilt having 12" (finished) blocks with 3" (finished) sashing using images of Daysail by Bonnie & Camille for Moda that I saved off of the online store's website where I purchased the fabric.


You can see from the picture that the scale of the print is off and that you can't really see any detail in many of the fabric prints.  To fix this, you could resize all of your images in a photo editing software or you can fake it in EQ7 very simply, here is how:

1.  Go into into the layout tab at the bottom of the quilt page.  You can see from the Horizontal Layout tab that my quilt is 48" x 48" with 12" blocks and 3" sashing.  


2.  Rescale your block (and sashing size) to be 1/2 to 1/4 of the original.  For this quilt I shrunk the quilt size to 1/3 of the original (by dividing the block and sashing size by 3) so that my quilt became 16" x 16" with 4" blocks and 1" sashing.  You may have to play around with the rescaling factor to work with your blocks and fabric pictures.


And here is the resized quilt:


You can see how the quilt looks now.  Much better, right?  You can actually see the images of the fabrics in this picture!  (Just make sure that when printing templates or figuring out yardage you are using the original version and not the shrunken one).

Here are the two versions side by side for comparison:


I hope this this tip helps you!  If you have any questions, please leave them in the comments below or e-mail me and I will do my best to answer them.

I am linking up to Tips and Tutorials Tuesday @ Late Night Quilter, Main Crush Monday @ Cooking Up Quilts, Sew Cute Tuesday @ Blossom Heart Quilts, and Fabric Tuesday @ Quilt Story.


Tuesday, June 30, 2015

Tutorial - How to Design Triangle Quilts in EQ7


For the Modern Quilt Guild Challenge, we had to use the Riley Blake fabric the Cottage Garden collection in a quilted item, challenging ourselves to make something we never have before.  
An isosceles triangle quilt has been on my to-do list forever, so I decided that was what I was going to make.  

I usually use EQ7 (Electronic Quilt) software to play with different layouts, fabrics, colors, and sizes before setting on a design to make, but I had no clue how to use EQ7 to design a triangle quilt.  I dove into the instruction manual (which is awesome by the way) and learned how to design a triangle quilt quickly and easily.  I would like to share that knowledge with you today.

To design a triangle quilt in EQ7:


1.  Within EQ7, select the tab "Quilt" at the top of the screen, then "New Quilt", then "One Patch Quilt"


2.  The new quilt that shows up will automatically default to a hexagon quilt.  Now select the tab "Layout" at the bottom of the screen.


3.  A One Patch Layout Screen will pop up.  Use the pull down menu on Patch style and select Thousand Pyramids.  (Note: by changing the patch style you can create other types of one patch quilts such as hexagon, diamond, and tumbler.)


4.  Now you just need to play with your dimensions and setting to get the type of triangle and the size quilt you would like.  I wanted an 
isosceles triangle so I set my width and height to be equal.  You can change the number of units in the horizontal direction and the vertical direction.


5.  Finally, you can design your quilt to have half triangles on the ends of the rows forming straight sides or design your quilt to have full triangles on the ends of the rows for a zigzag edge.  The straight side version is what comes up automatically, to get the zigzag sides, select the tab "Borders" at the bottom of the screen and press the Delete button to delete the border.


The design on the left has a border and the design on the right has no border.

I hope that this tutorial was helpful!  If you have any questions, please leave them in the comments below or e-mail me and I will do my best to answer them.


I am linking up to Tips and Tutorials Tuesday over at the wonderful Late Night Quilter's blog.