Showing posts with label Tutorial. Show all posts

Tuesday, March 16, 2021

Rock & Roll Quilt Tutorial

As an OLFA Creator, I had the opportunity to create a new tutorial for the OLFA blog in 2019 called the Rock & Roll Baby Quilt. Since then, the OLFA blog has been updated and the pattern is no longer on their blog so I am reposting the free quilt pattern here for you :)

Rock & Roll Baby Quilt

SIZE 40 ½" x 52 ½"

My good friends have a baby boy due in a few months and I wanted to make them a fun baby quilt for their shower. The pattern is very beginner friendly and a great way to use up scraps. The blocks form X's and O's for lots of hugs and kisses.


PATTERN NOTES
  • Width of fabrics (WOF) is assumed to be at least 41". A fat quarter is assumed to be at least 18" x 20".
  • A scant ¼" (a thread width smaller than ¼") seam is to be used throughout the construction of the quilt unless otherwise instructed.
  • The quilt finishes at a baby size of 40 ½" x 52 ½"


MATERIAL REQUIREMENTS

Print fabrics: 8-10 fat quarters or strip scraps (1 ½" to 3" wide by at least 8" long)
Background fabric: 1 ¾ yards
Binding fabric: ½ yard
Backing fabric: 1 ⅔ yards
Batting: 49" x 61"


CUTTING INSTRUCTIONS

Print Fabrics


Begin by cutting about half of each fat quarter into 1 ½" to 3" x 18" strips (shorter side of the fat quarter) and then cut more strips as needed during piecing.

Background Fabric

1. Cut 5 strips 7 ¼" x WOF
a. Sub-cut the strips into 24 squares 7 ¼" x 7 ¼" (each strip can yield 5 squares)

2. Cut 5 strips 2 ½" x WOF. (borders)


PIECING INSTRUCTIONS

1. Sew print strips together and trim to make 24 strip-pieced squares 7 ¼" x 7 ¼". If your strips are 15" or longer, you can sew the longer strips together and cut multiple squares out the strip sets.


2. Draw a diagonal line using a removable marking device on the back of the background square (shown as the solid line).

3. Place a background square on a strip-pieced square (with the strips going vertically) right sides together with:

Half (12) of the drawn lines on the back of the background square going from upper left to lower right
Half (12) of the drawn lines on the back of the background square going from upper right to lower left


4. Sew a ¼" seam on each side of the solid line (shown as the dotted lines). Cut on the solid line and press seams towards the background fabric to make a half square triangle (HST). Repeat to make 48 HSTs (measuring about 6 ½" x 6 ½").


5. Trim each HST to 6 ½" x 6 ½" and try to have at least ½" width of the strips on the sides of the HST (We started with oversized squares to leave a bit more wiggle room.) Using the OLFA 6 ½" Square Ruler and the OLFA Rotating Rotary Mat make trimming quick and easy.


6. Layout the 48 HSTs according to the quilt top diagram making sure that all of the strips are running horizontal across the width of the quilt.


7. Sew HSTs into rows and then sew rows together, pressing all seams open to make the quilt top, before borders are added, should measure 36 ½" x 48 ½".

8. Cut a background strip 2 ½" x WOF in half, sew each half background strip to a full background strip 2 ½" x WOF, and trim to the average height of the quilt top, approx. 48 ½". Sew borders onto the sides of the quilt top, pressing seams open or towards the borders.

9. Trim 2 strips 2 ½" x WOF to the average width of the quilt top, approx. 40 ½". Sew borders onto the top and bottom of the quilt top, pressing seams open or towards the borders.

The finished quilt top should measure approx. 40 ½" x 52 ½".


FINISHING

1. Because of the width (40 ½") of the quilt top, it may be possible to use a single width of fabric for the backing. If you find the backing fabric a little narrow, you can use scraps from making the strip-pieced squares to widen the backing.

2. Layer the quilt top, batting, and backing.

3. Baste and quilt as desired. For my quilt, I used straight lines in the pieced sections and an open swirl design in the background. I used Aurifil 50wt thread in a light gray/blue to match the background fabric.

4. Cut the binding fabric into 5 strips 2 ½" x WOF. Sew together the strips end-to-end to make the binding. Bind and enjoy your quilt!


I would love to see what you make with the Rock & Roll Baby Quilt tutorial!  You can share on social media using #RockandRollQuilt and tag me.  Thanks!



Monday, November 16, 2020

How to: Glue Baste Curves


How do you like to baste your curved blocks to prep them for sewing? Do you pin? Do you use glue? Do you not baste at all?

I was a pinner and I probably over-pinned.  I would rather take the time to make sure the edges of the fabric pieces were aligned and set before sewing than trying to align them while stitching them together.  For the blocks above I would probably have used up to 20 pins.  This was not only time consuming, but while I was sewing I had to make sure my fabric I was keeping a 1/4" seam allowance while taking out each pin before I sewed over it.

I had used glue basting for bindings and EPP (English paper piecing) so I decided to give glue basting a try and I fell in love.  I thought I would put together a short tutorial on how I glue basted my Awning blocks but this technique will work on Drunkard's Path blocks, or really any seam (curved or straight).

My reasons for falling in love with glue basting:
  • I found glue basting to be quicker than pin basting both during the basting and during the sewing.
  • I also found glue basting to be more accurate than pin basting with the convex and concave fabric edges staying aligned better.
  • No tucks!  I sewed all 30 half moon shaped blocks for Awning without a single tuck or need to unsew!


TOOLS FOR GLUE BASTING

To glue baste curves, you need just enough glue to hold the fabric together while sewing.  I would recommend a glue stick type glue over an Elmer's type glue because it is dryer and easier to apply just a small amount.

My favorite glue pen is by Sewline.  You can find these glue pens in your local quilt shop, on Amazon, or on Etsy.  I purchase mine on Etsy as I have found the best prices there. 


Sewline glue pen

Sewline 6-pack glue refill


STEP 1 - PREP YOUR FABRICS

To start glue basting, fold and mark your two fabric pieces at the center and quarters by finger pressing, ironing, or using a removable marking device.  I like to use my iron to make the creases.


STEP 2 - GLUE THE CENTER

I place my two fabric pieces together, with the convex piece on the bottom and the concave piece on top, right sides together.

I start glue basting by using just a dab of glue from my glue pen to adhere the centers of the two pieces.  


STEP 3 - BASTE FROM CENTER OUT

I next add a little glue right along the edge of the convex fabric piece from the center to one of the quarter markings.  I try to keep the glue to less than 1/4" from the edge at the center.  

The glue can get on the mat behind the block so you may wish to use a piece of paper or extra mat you an easily wash behind the block.


I slowly ease the two fabrics together, matching the edges and pressing to adhere, from the center of the block out to the quarter mark. 

Continue to baste the other sections of the block in the same manner. 


If you are using just a little glue stick there is no need to iron to dry or set the glue, it should dry quickly.


STEP 4 - SEW YOUR BLOCK

Now that your block is basted, you can go over to the sewing machine and sew the pieces together without having to worry about pulling out pins (or sewing over them) or keeping the fabric piece edges aligned.

Once you have sewn your curved block, press the seam (the direction you like to press or what is indicated in the pattern.


I hope that I have inspired you to glue basting a chance, I have definitely converted from pinning or gluing. Give it a chance for a block or two to see you like it.

If you want to try making your own half moon blocks, you can get the Awning Pattern from my pattern shop. 


*affiliate links - This post contains affiliate links. If you purchase items through the links I will earn a very small commission. You will not pay more when buying a product through my link


Wednesday, November 7, 2018

How to Match Quilt Backings ++ a Tutorial


I am one of those quilters who once the quilt top is finished, want to get the backing ready as quickly as possible so that I can get to the quilting. I love wide back fabrics for this reason.

When I do need to piece a back for a quilt, typically I use all of the same fabric sewn together with as few seams as possible.  Usually the fabrics are solids or a busy print so I just stitch them and the seam is barely noticeable.  

Once in a while I use a print like in the picture above, Meteor Shower from the Birds and the Bees collection by Tula Pink for FreeSpirit where the seam would show a lot.  For these, I take the time to match the pattern on the backing so the seam is less visible.  

I took some pictures of my process for a little tutorial for you.


Step 1 - Take a look at your fabric and figure out the repeat pattern. Cut the two (or more) lengths of fabric for the backing, being sure to cut extra to allow length for moving the fabric pieces relative to each other to match the patterns.


Step 2 - Iron a crease along the length of the fabric on one of the lengths.  Line up the creased fabric on top of the other length of fabric so that the patterns match and pin in place.


Step 3 - Glue the folded part of the creased fabric to the other length of fabric lightly to hold it in place (you are just basting so use the glue sparingly). Be sure to use a water soluble glue, you can use Elmer's glue as shown or a glue stick. After adding the glue, an iron can be used to press the crease again and help the glue set.


Step 4 - Remove the pins and open the creased fabric. Sew on the crease to join the two lengths of fabric.


Step 5 - Trim the seam to about 1/2" (I just use scissors).  The seam is glued shut but if you used glue sparingly, you can easily pull the fabrics apart.  Press the seam open or to the side and you are ready to use your backing!  

Once you quilt your quilt, the seam will be almost invisible :)


I am excited to link this new tutorial up to the Tips and Tutorials Festival next week!


Friday, August 31, 2018

Pocket Full of Change ++ Quilt Pattern Tutorial

I have a fun finish and free quilt pattern tutorial to share with you today...Pocket Full of Change, perfect for using up larger scraps and left over bits of layer cakes.

This pattern is really more of a formula and general guidelines so feel free to change up the design and sizes to make the pattern fit your scraps and needs.

When designing this quilt I wanted to make a lap sized quilt for my co-worker's new foster child (I make each of her foster children a quilt), about 50" x 60".

Pocket Full of Change


For my version I used scraps from my pink/red scrap bin along with some extra layer cake slices I had lying around.  I really liked being able to use larger sized scraps in the design so I could use fabric with larger scale prints.

To design the quilt, I started with some notebook paper and figured out the dimensions...


Material Requirements

       Scraps: a bunch of scraps 10" wide, I used about 26 scrap pieces 4 ½" to 12 ½" tall x 10" wide
       Outer stripe for middle areas (white in quilt): ⅝ yard
       Inner stripe for middle areas: ½ yard
       Binding: ½ yard  (6 strips 2 ½" x WOF)

Scrappy Columns

1.  Lay out scraps into 3 columns of about 58"- 60" each.  When you lay out your scraps, they will be longer than 60", but when sewn together each fabric piece will shrink ½" in height due to seam allowances.  My scraps were between 4 ½" to 12 ½" tall and I had between 8 and 10 fabric pieces per column.

2.  Sew scraps into the three columns, pressing seams in your favorite direction.  I like to press my seams open.


Middle Columns

This is where the 58"-60" height of the scrappy columns is helpful.  With that length, the stripes within the middle columns can be made using a full width of fabric (WOF) sewn to a half WOF strip so the fabric is used very efficiently with little waste.

1.  Cut 6 strips 3" x WOF of the outer stripe fabric (white in the cover quilt).

       a.  Cut 2 of the strips in half to make 4 half strips and sew each half to a full width strip to make 4 outer stripes, each about 60" long.

2.  Cut 3 strips 4 ½" x WOF of the inner stripe fabric (dark pink print in the cover quilt)

       a.  Cut 1 strip in half to make 2 half strips and sew each half to a full width strip to make 2 inner stripes, each about 60" long.

3.  Sew two outer stripes and one inner stripe together such that the outer stripes sandwich the inner stripe.  Repeat to make 2 middle columns.


Quilt Top Assembly

1.  Sew the three scrappy columns and the two middle areas together to create the quilt top.  Trim the top and bottom of the quilt top even and your quilt top is finished!  Super easy, a great design to use up some scraps, and no seams to match :)


For my quilt, I quilted the scrappy columns with a stipple, the white stripes with am elongated swirl design, and the middle dark pink strips with a gentle back and forth design.


For the backing, I used a Loominous print from Anna Maria Horner.  It is super light weight cotton fabric, just a little heavier than a gauze.  I was worried at how it would work for the quilt back, but it gives the quilt such a great, soft feel.


I hope that you enjoyed the Pocket Full of Change quilt pattern tutorial :)  If you decide you make your own Pocket Full of Change, I would love to see it!  You can share on social media as #PocketFullofChangeQuilt and be sure to tag me!


I'm linking up to the Finished or Not Linky Party hosted by Busy Hands Quilts.


Wednesday, May 23, 2018

Quilt Basics ++ Quilt Basting

Today, I would like to to show you how I baste quilts.  The step of basting is definitely not one of my favorite parts of quilt making, but it is a very important step to make sure you wind up with a nice finished quilt without any tucks or pleats in the quilt top or backing.  I came up with my way of basting over the last few years, reading about how other bloggers bast their quilts and by trial and error.

In developing a process that worked for me, my "musts" were:
  1. Uses basting spray instead of pins.  I prefer the speed of spray and it is easier on my hands.
  2. Sprays the basting spray outside, I do not want any fumes in my house or spray glue on my floors or furniture.
  3. Uses a wall to wall carpeted floor (because that is what my house has).
Tools / Notions
You can find these and many of the products I use in quilting making on my Amazon page (all Amazon links are affiliate).
  • Basting spray - I only use Odif Usa 505 Spray.  I find that this spray holds well and washes out (some other brands I have found not to wash off, leaving fabrics with sticky residue).
  • Basting pins - I use stainless steel T-pins to hold the quilt backing to the floor through the wall to wall carpeting.
  • Batting - My favorite batting is Warm & White by the Warm Company which is a cotton batting.  I have never used all polyester batting, but heard that it sometimes has more difficulty sticking with basting spray.


Here are my five simple steps to making basting as easy and pain free as possible.

1.  Spray the backing

I take my quilt backing outside (I usually lay the fabric on the grass away from the house) and spray the wrong side of the backing with the basting spray.  If the fabric is light colored, I first lay down an old sheet and then the backing fabric to make sure the backing does not get dirty.


2.  Pin the backing to the floor

I lay out the backing (spray basted, wrong side up) onto the wall to wall carpeted area.  Using T-pins, I pin the perimeter of the backing to the carpet every 3-5 inches.  I make the backing taunt, but try not to stretch it.


3.  Lay batting onto the backing

Next, I lay the batting over the backing and smooth it flat with my hands.  I usually start in the middle area of the quilt and spread towards the edges.


4.  Spray the quilt top

I take my quilt top outside and spray the wrong side with the basting spray.  Once again, if the fabric is light colored, I first lay down an old sheet and then the quilt top.


5.  Lay the quilt top onto the batting

I lay the quilt top onto the batting and using the same process as with the batting, I start in the middle area of the quilt top and smooth towards the edges.  If the quilt is very large (anything larger than a lap size) then I also add a few safety pins through the quilt sandwich to make sure there is no slipping.  I space the pins out about every foot or so.

After the three layers are all together, I actually walk all over the quilt, using the weight of my body to press the fabric, batting, and adhesive together (to make sure that the three layers are all adhered well together). I have tried ironing my quilt sandwich after it is basted and have not found it to make a difference in my quilts so I skip that step.

Baby version of Celestial from the Modern Plus Sigh Quilts book

Congrats!  Your quilt is basted and ready to quilt!  I have had quilts basted and ready to quilt for 5+ months and the basting spray still gives a great hold to the layers.  Come back Friday to see the reveal of the finished Celestial baby quilt.
Are you a spray baster or pin baster?  Do you have any tips that make basting quicker or easier?


I am excited for the upcoming Tips and Tutorials Festival (starting on June 11th) I am co-hosting with Yvonne from Quilting Jetgirl and will be linking up this tutorial :)


Tuesday, January 30, 2018

Butterfly Wings Quilting Design Tutorial


This past Friday I shared a quilt and pattern I made for the latest issue of Modern Quilts Unlimited called Flutter.  I created a special quilting design in the drunkard's path curved blocks and I promised a tutorial on how I did it, so here it is :)

This design is easy to do on a domestic (or longarm) sewing machine and requires very little marking.  For this design, I used my Bernina ruler foot on my domestic machine and set up my machine and ruler according to my 5 tips for successful domestic ruler work post here.

The ruler I used was the Quick Curved Longarm Ruler (affiliate link) I got off of Amazon, but you could make this work with any gentle curved ruler.  Before I used the ruler for the first time, I added a couple of Handi Grip Adhesive squares to the back of the ruler, which I find helps a tremendous keeping the ruler from slipping on the fabric.

To start, here is my drunkards path "block", drawn in Sharpie on a piece of fabric.


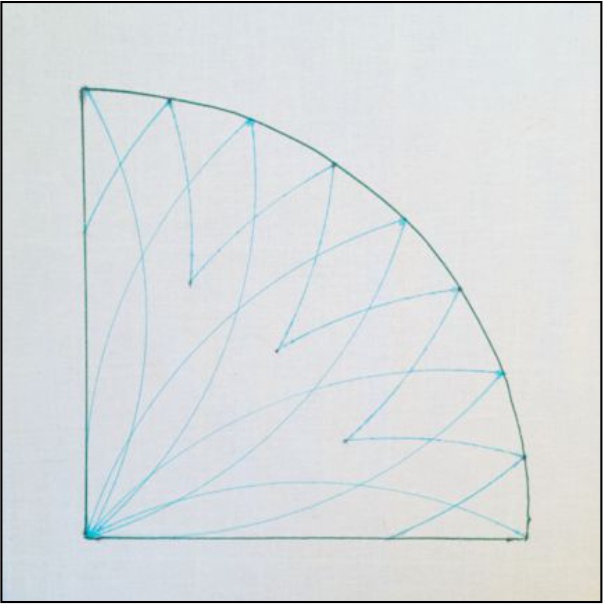
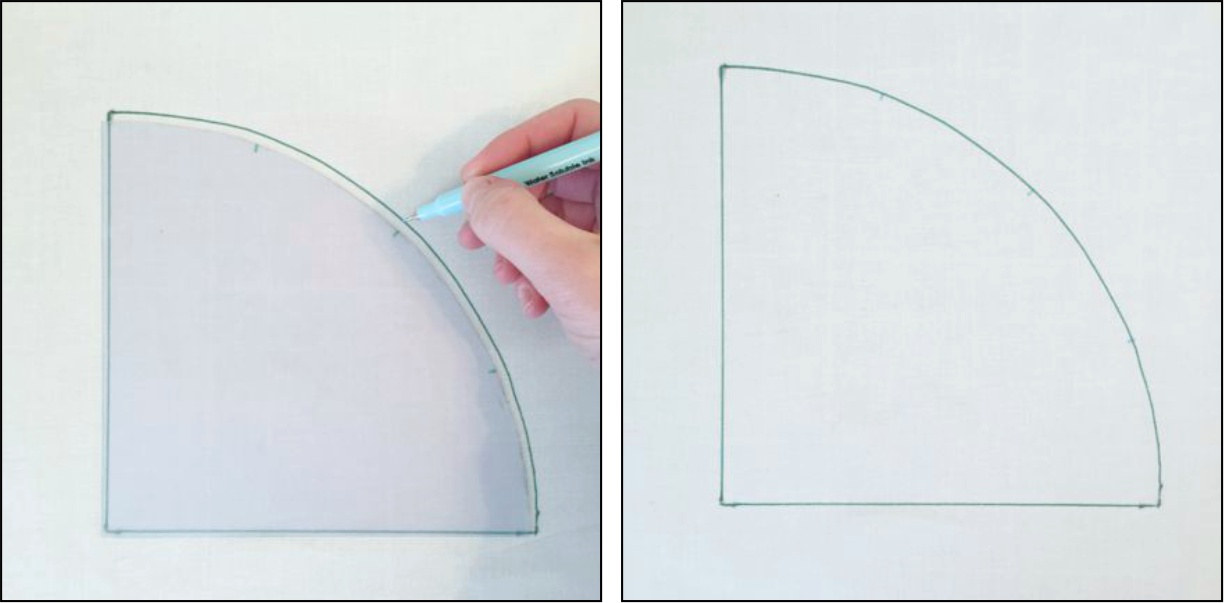
For the first part of the design, you only need to mark the center and quarters on the curve of the block (using a removable marking method).  Because I had a lot of blocks to mark, I put marks right on my template so I could mark all of my blocks quickly and consistently.


Starting in at one edge of the curve and using your ruler, quilt a curved line down to the lower corner.


Next, travel from the bottom corner up to the quarter marked line on the curve edge.  Continue going up and back to each mark on the edge of the curve until you reach the other side of the block.  

You can stop here and have a very nice quilting design that has a petal-like quality to it.  This was my original design, but when I quilted Flutter, I felt that the space between the quilting lines was a little too large compared to the other quilting on the quilt so I added a second layer of quilting.


To add the second layer of quilting, mark (I just approximated the positioning) between the first set of marks on the curve and between the where the quilting lines intersected in the middle of the block.  These marks are shown as gray dots on the block below.

Quilt this second layer of quilting just like the first.  This extra quilting really makes the design look complicated and gives movement to the quilting.


I hope that my tutorial was clear and helpful, happy quilting!!


Tuesday, February 16, 2016

How to Block Quilts

When I finished quilting my Outlined Plus mini last week, the quilt did not lay flat due to the straight line quilting on the bias.  You can see the waves below, this was definitely not attractive so I blocked the quilt to flatten it.  Some people had asked about blocking a quilt so I took some pictures to show my process.


I do not block all of my quilts, I typically block quilts for magazines, show quilts, and minis.  I find that blocking makes the quilt lie flat and hang really nicely.  I usually do not block bed quilts or anything larger than a lap size (I find that these usually lay pretty flat and even if they are a little wavy, you can’t really tell on a bed).

Disclaimer – This is how I block my quilts, if you have a very delicate quilt or are worried about color bleeding, I suggest you alter or augment these directions.

I block my quilts after quilting and before trimming any of the excess backing and batting off.

Step 1 – Give the quilt a bath.  

I fill my bathtub with warm (not hot or cold) water and immerse the quilt for 5-10 minutes.  I gently move the quilt around in the water once and while.  I do not add anything to the water (no soap or detergent, Color Catchers, or Synthrapol).


Step 2 – Give the quilt a spin.  

I carry the quilt over to my washer machine and run it in the spin cycle for 3-5 minutes.  This gets a lot of the water out of the quilt.


Step 3 – Give the quilt some shape.  

I take my spun quilt and place it on my wall to wall carpeting.  (If you are worried about the quilt bleeding onto the carpet you can place a towel or sheet between the quilt and the carpet).  I slowly begin to flatten the quilt out, smoothing and tugging the quilt around to get the quilt to lie flat and the seams to be straight.  Some people use a laser level to help with the straightness. 

I use T-pins to pin the quilt to the carpet (my husband picked these up for me at Harbor Freight Tools, but they are available in virtually any hardware store, Amazon, and most craft stores).   I place the T pins in the batting all around the quilt top.  


In about half a day (you can turn on an overhead fan or place a box fan next to the quilt to speed up the drying), the quilt is dry and ready to be trimmed and bound. The quilt is now nice and flat, what an improvement!


And here is my Outlined Plus mini quilt, bound and finished.  I hope you try blocking your quilt the next time you have a quilt that does not lay exactly flat after quilting :)