Monday, August 28, 2017

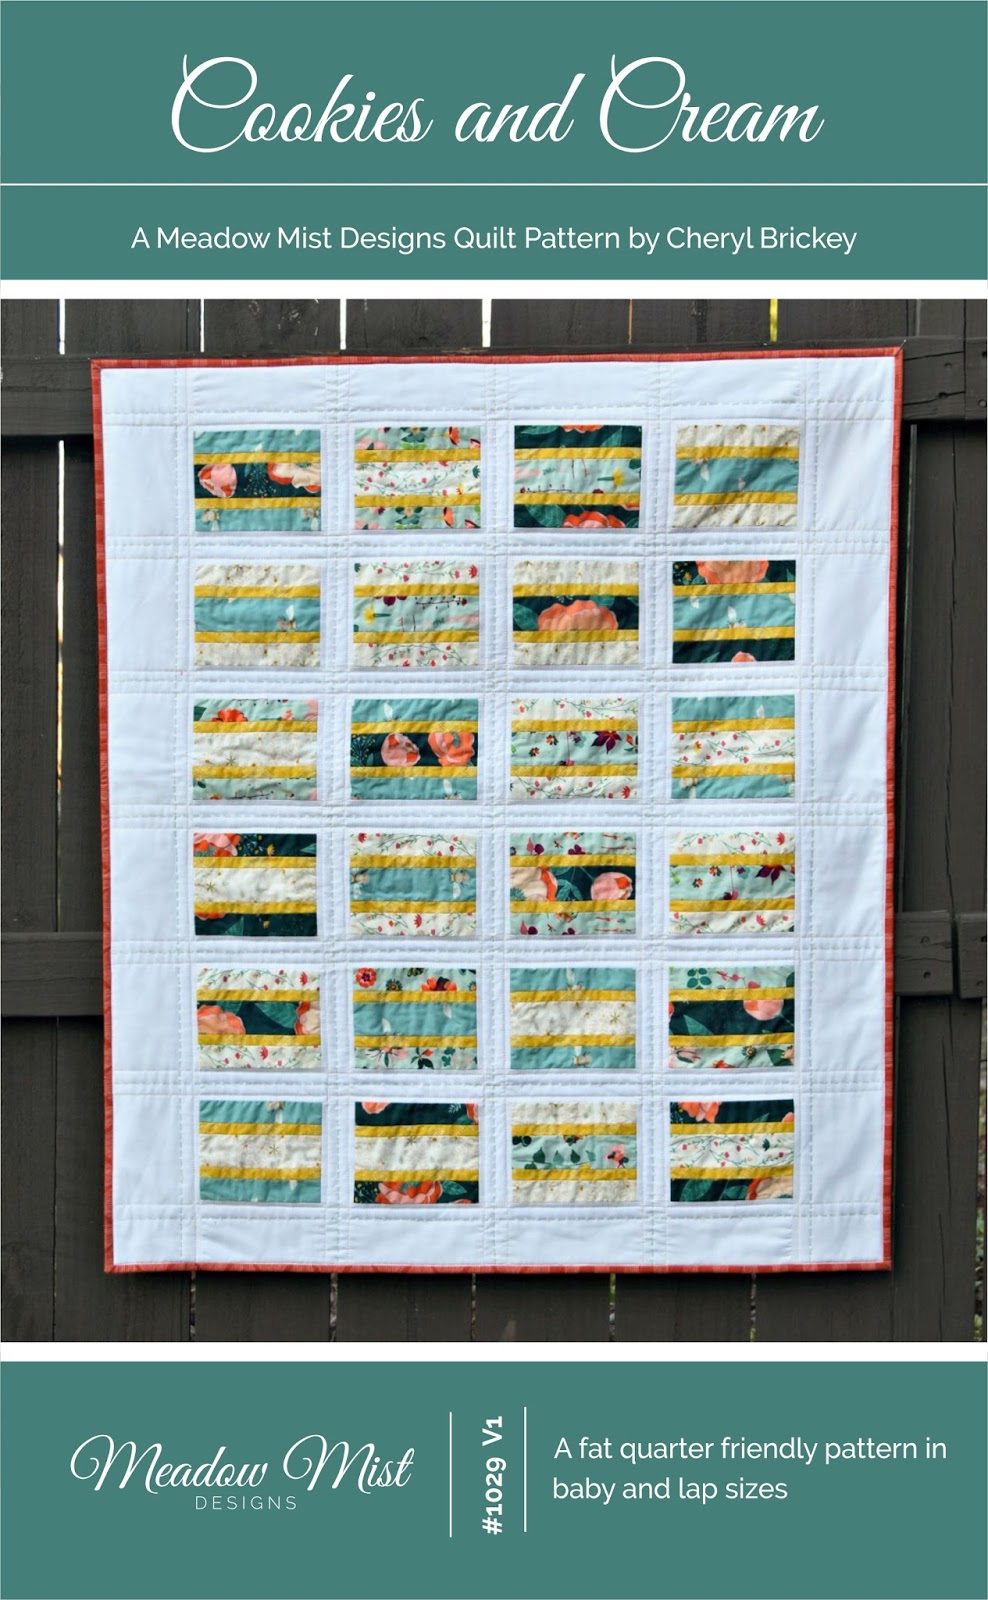
Cookies and Cream ++ Pattern Release

I am excited to announce that my pattern, Cookie and Cream is now available as a stand along digital quilt pattern in two sizes! You can now find the pattern on Etsy and Craftsy.


The pattern is on sale half off for one week (through Monday September 4th at midnight) for only $5.00. (You can use coupon code TWOPATTERNS for $2 off two patterns or THREEPATTERNS $4 off 3 patterns in my Etsy shop for even more savings.)

Cookies and Cream is a fun and easy fat quarter friendly pattern with blocks that resemble sandwich cookies. All you need is 5 fat quarters and a yard of background fabric to make the baby quilt top!

The cover version of the quilt was made using prints from the Garden Dreamer collection by Maureen Cracknell for Art Gallery Fabrics and a white background from Needle and Foot Fine Fabrics.

For the quilting, some simple outline quilting and a bit of hand quilting finished the quilt.


Many, many thanks to Paige of Quilted Blooms and Yvonne of Quilting Jetgirl for their awesome tech editing and reviewing!!

Just a reminder, you can find Cookies and Cream at Etsy and Craftsy for $5.00 for the next week :)


Thursday, August 24, 2017

Piece and Quilt with Precuts Blog Hop - Morse Code - My Version of Dot 'n' Dash

Christa Watson, a good quilting friend of mine, just launched her 3rd book called Piece and Quilt with Precuts: 11 Quilts, 18 Machine-Quilting Designs, Start-to-Finish Success. (affiliate link)  I love Christa's books in that they take you all the way from fabric selection, through the quilt top making process, and through the quilting process too.  It is a pattern book and a quilting book in one!


Christa sent me a copy of the book and I chose to remake the Dot 'n' Dash quilt pattern with a little twist in the fabric selection and size.  Here is the book version of Dot 'n' Dash, a lap sized quilt.

Photography courtesy of Martingale/That Patchwork Place

The Dot 'n' Dash pattern is written for jelly rolls (which makes for a very speedy quilt top). I did not have a jelly roll that I wanted to use, but I had this wonderful print from Anna Maria Horner that I did not know what to do with. The print is Crossing Paths from the Lou Lou Thi Needleworks collection and it is a 58" wide quilting cotton with stripes running from selvedge to selvedge with cross-stitch patterns on them.

Instead of cutting the fabric the traditional way (selvedge to selvedge), I cut the Crossing Paths fabric along the length of the fabric so each of my pieces contained different colored stripes.  It gave the look of improv sewing a bunch of fabrics together with much less work.  I actually made the entire quilt (top, binding, and backing) with only this print and some white background fabric! I thought it was a neat touch to have the backing show what the fabric looked like before it was chopped up. 


I changed the number of blocks in the quilt to bring it down to a baby size. I am always needing baby quilts as gifts so it is good to have one finished in case I need one in a hurry.  My version finished at about 40" x 48".


The quilt top came together very quickly and easily and soon it was time to bast and quilt.  I quilted using the continuous stipple design from the book (shown on the Windows quilt in Piece and Quilt with Precuts).  Stippling is one of my favorite quilting designs, it gives great texture and is very quick.  


With so much white, I would have typically gone with a white thread, but to add just a hint of color, I used really light pink Aurifil thread in 50 wt. for the quilting.


I really enjoyed Christa's book, especially how it combined great looking quilt designs, easy to follow instructions, and inspirational quilting designs.  You can pick up a copy of Christa's book over on Amazon by clicking here (affiliate link) or buy a signed copy in Christa's store.

Follow along with the hop - There are multiple quilters showing different versions of each of the book patterns over the course of the hop, you find a listing of all the different posts over on Christa's blog.


Monday, August 21, 2017

Guest Posting at Quilt Theory

I'm over on the Quilt Theory blog today kicking off a series to give readers a little more insight into the Quilt Theory designers.  Yvonne is my first victim interviewee :)  To learn more about Yvonne @ Quilting Jetgirl in my serious (and not so serious) interview, you can click right here.


Friday, August 18, 2017

Taste the Rainbow

I have excited finish to show today, Taste the Rainbow, a modern birds in the air mini quilt is finally all done!


My local modern quilt guild (the Greenville Modern Quilt Guild) announced a challenge in late spring to make a mini quilt (less than 36" on all sides) with a modern take on the classic birds in the air block.

I love the birds in the air block (in fact the quilt design I have published in the 2018 Quilter's Planner is take on the block, you can see it here.)

My mind went towards how to place the blocks without the traditional grid and thought of a circular design.  Combining that with a rainbow palette and I had the beginnings of my quilt design.  The rainbow fabrics are a mixture of fabric manufacturers with the majority of the fabrics being Robert Kaufman Kona Cottons and Michael Miller Cotton Coutures.  The background is a Blueberry Park print from Karen Lewis for Robert Kaufman.

I used Corel Draw to draw out the design and create the paper piecing templates.  In order to keep everything well aligned and spaced, I added a lot of radial lines, you can see the craziness.

In my first iteration of the design, all of the blocks were facing the same direction but as I continued to play with the design, I flipped the blocks so they were alternating facing inside and outside.

Once the design was finalized (at 32 1/2" x 32 1/2"), I created the paper piecing templates.  The circle has 16 slices, each slice contains 4 sections, and each section contains 3-8 pieces of fabric.  Needless to say, this was not a quick quilt to make.


The quilt top finished was finally finished and then it was time to quilt bast and quilt.  Aurifil sent me matching 12 wt threads for each of the triangles.


My first thought was to add little cross-stitch crosses into the triangles but I did not think that looked right.  I then tried french knots, then walking foot quilting, and then free motion quilting.  I was not happy with any of these.  Finally I tried adding some running stitch embroidery (I am calling it embroidery as the stitches only go through the top layer, they are not quilting stitches) and I loved how it looked.  I added running stitches with 1/8" spacing between the lines.  This also took a long time but gave me a nice hand project for when I was outside with the kids.

I quilted the background by echoing the triangle shapes close to the seam lines and then adding some concentric 16 sided polygons.


So here is the finished quilt, I am really happy with how it turned out.  As a bonus, I won first place in the guild challenge!


As I have been sharing sneak peeks of the design I had a number of quilters ask if I could release this quilt as a pattern, I am happy to oblige :)

Taste the Rainbow Templates - Craftsy & Etsy

Note: This is a set of advanced level paper piecing templates, not a full pattern.  The instructions do not contain general paper piecing instructions, sizes of fabric pieces to cut, or seam allowances printed on the template sections.  The mini quilt finishes at 32 1/2" x 32 1/2".

You can find the instructions on sale at both Craftsy and Etsy for only $5 for the next week (ending at midnight on Friday the 25th).  After Friday, the instructions will go up to $7.50.

Thanks for taking a look and thank you to my pattern reviewers Paige @ Quilted Bloooms and Yvonne @ Quilting Jetgirl for all of their time and experience.



Wednesday, August 16, 2017

Quilter's Planner - Sampler Quilt

I have another fun secret sewing project to share today...

You know that I designed a quilt pattern for the 2018 Quilter's Planner from my post last week, this week I get to show you another new feature for the 2018 Quilter's Planner, a full sampler quilt pattern that I designed!  You can find out more about the planner and all of the other wonderful new additions here (affiliate link).

When Stephanie approached me about possibly designing a sampler for the Quilter's Planner I said "Yes!" right away.  I love designing quilt alongs and loved the challenge to create a fun and easy paced quilt along with a modern and fresh feel to it (along with an alternative more traditional layout).

The sampler quilt contains instructions for 12 different blocks and two quilt top layouts, a more modern on point version and a more traditional version.  I am planning on sewing along next year to make the on point version with some of my Bonnie and Camille fabrics.

I designed the quilts and wrote the instructions, Susan Bishop (@suebquilts) pieced the quilts and Mandy (@mandaleiquilts, Mandalei Quilts) quilted the quilts.  They both did such a beautiful job!

Here are some pictures of the finished quilts...


Photograph by Kitty Wilkin @nightquilter, taken for The Quilter's Planner 2018 @thequiltersplanner


Photograph by Kitty Wilkin @nightquilter, taken for The Quilter's Planner 2018 @thequiltersplanner


Photograph by Kitty Wilkin @nightquilter, taken for The Quilter's Planner 2018 @thequiltersplanner


Photograph by Kitty Wilkin @nightquilter, taken for The Quilter's Planner 2018 @thequiltersplanner


Photograph by Kitty Wilkin @nightquilter, taken for The Quilter's Planner 2018 @thequiltersplanner

Just remember, you can now pre-order your Quilter's Planner 2018 right here and the bundle right here (and you can learn about all of the other new features and my other pattern I have in the planner in my blog post from last week).

Which is your favorite version - the more modern or traditional?  Are you thinking about joining in?