Friday, August 31, 2018

Pocket Full of Change ++ Quilt Pattern Tutorial

I have a fun finish and free quilt pattern tutorial to share with you today...Pocket Full of Change, perfect for using up larger scraps and left over bits of layer cakes.

This pattern is really more of a formula and general guidelines so feel free to change up the design and sizes to make the pattern fit your scraps and needs.

When designing this quilt I wanted to make a lap sized quilt for my co-worker's new foster child (I make each of her foster children a quilt), about 50" x 60".

Pocket Full of Change


For my version I used scraps from my pink/red scrap bin along with some extra layer cake slices I had lying around.  I really liked being able to use larger sized scraps in the design so I could use fabric with larger scale prints.

To design the quilt, I started with some notebook paper and figured out the dimensions...


Material Requirements

       Scraps: a bunch of scraps 10" wide, I used about 26 scrap pieces 4 ½" to 12 ½" tall x 10" wide
       Outer stripe for middle areas (white in quilt): ⅝ yard
       Inner stripe for middle areas: ½ yard
       Binding: ½ yard  (6 strips 2 ½" x WOF)

Scrappy Columns

1.  Lay out scraps into 3 columns of about 58"- 60" each.  When you lay out your scraps, they will be longer than 60", but when sewn together each fabric piece will shrink ½" in height due to seam allowances.  My scraps were between 4 ½" to 12 ½" tall and I had between 8 and 10 fabric pieces per column.

2.  Sew scraps into the three columns, pressing seams in your favorite direction.  I like to press my seams open.


Middle Columns

This is where the 58"-60" height of the scrappy columns is helpful.  With that length, the stripes within the middle columns can be made using a full width of fabric (WOF) sewn to a half WOF strip so the fabric is used very efficiently with little waste.

1.  Cut 6 strips 3" x WOF of the outer stripe fabric (white in the cover quilt).

       a.  Cut 2 of the strips in half to make 4 half strips and sew each half to a full width strip to make 4 outer stripes, each about 60" long.

2.  Cut 3 strips 4 ½" x WOF of the inner stripe fabric (dark pink print in the cover quilt)

       a.  Cut 1 strip in half to make 2 half strips and sew each half to a full width strip to make 2 inner stripes, each about 60" long.

3.  Sew two outer stripes and one inner stripe together such that the outer stripes sandwich the inner stripe.  Repeat to make 2 middle columns.


Quilt Top Assembly

1.  Sew the three scrappy columns and the two middle areas together to create the quilt top.  Trim the top and bottom of the quilt top even and your quilt top is finished!  Super easy, a great design to use up some scraps, and no seams to match :)


For my quilt, I quilted the scrappy columns with a stipple, the white stripes with am elongated swirl design, and the middle dark pink strips with a gentle back and forth design.


For the backing, I used a Loominous print from Anna Maria Horner.  It is super light weight cotton fabric, just a little heavier than a gauze.  I was worried at how it would work for the quilt back, but it gives the quilt such a great, soft feel.


I hope that you enjoyed the Pocket Full of Change quilt pattern tutorial :)  If you decide you make your own Pocket Full of Change, I would love to see it!  You can share on social media as #PocketFullofChangeQuilt and be sure to tag me!


I'm linking up to the Finished or Not Linky Party hosted by Busy Hands Quilts.


Tuesday, August 28, 2018

Olfa Endurance Review and Olfa Bundle Giveaway

I did a review on the 45 mm Endurance Blade last year (you can read it here) so when they recently launched a 60 mm version and asked me if I wanted to test it out and host a giveaway, I jumped at the chance!  (The Olfa cutter, blade, and mat were provided to me for no charge and the giveaway is sponsored by Olfa but all opinions are 100% mine.  Some links in post are affiliate links)


First up, the 60 mm Olfa Endurance blade (pictured on a pink 12" x 18" Olfa mat).  I have been hoping that Olfa was going to come out with this size since I tested and was wowed by the 45 mm Endurance blade.

I mostly use my 60 mm rotary cutter to trim up my quilts after quilting.  I have found that the larger blade size cuts the corners more precisely for nice square corners.  I have been testing the 60 mm Endurance blade for 6 weeks now, cutting quilts (and also a bunch of fabric for new quilt tops because I really wanted to use the blade a lot).  The blade is still cutting like a new blade, still nice and sharp.  It may cost more than regular blades, but with the sharpness and how long it lasts, I think that it is a really good value.

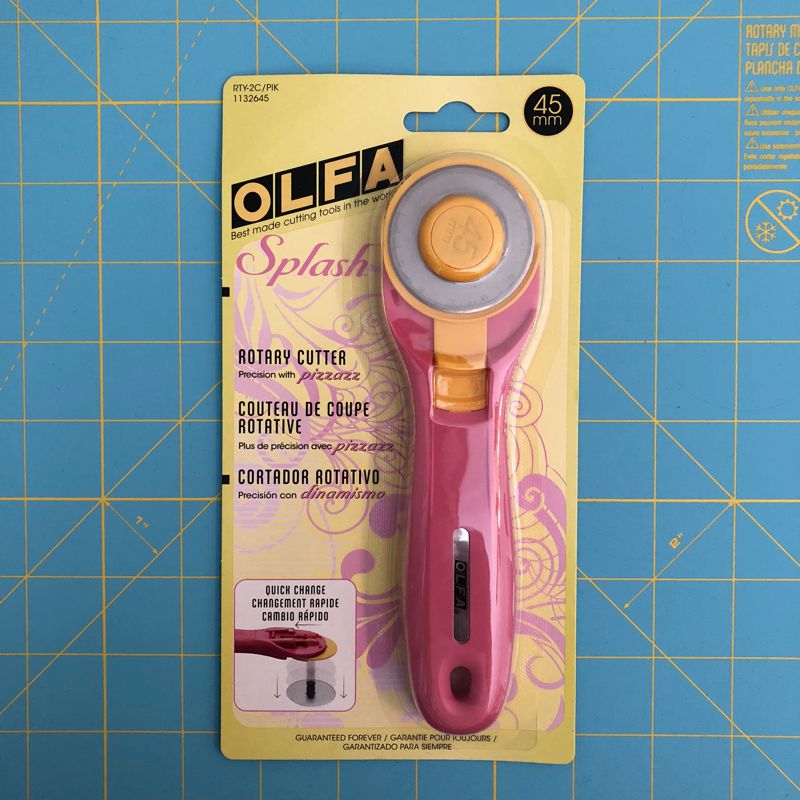
Next up is the pink Olfa Splash cutter (pictured on an aqua 12" x 18" Olfa mat).  My go to cutter is the Olfa Ergonomic cutter, but after working with the Splash cutter, I might be converted.   I liked how the safety turned on and off, how easy it was to change a blade, and it felt nice in my hand.

My 11 year old son is getting into quilting and he found the Splash cutter much easy to handle and cut with and use than the Ergonomic cutter.  Plus, how could I not love a pink cutter?  So cute!


Lastly, Olfa sent me two new cutting mats, one pink and one aqua.  You can probably seen these showing up in my Instagram feed, they are such fun colors and photograph so well.  They are the same great quality as the traditional darker green mats, I have trimmed over 300 HST on them and they still look like new.


In addition to being great mats, they make perfect backdrops for fabric pictures!  Here is a charm pack photographed on the back of the pink mat.


GIVEAWAY

Would you like a chance to win an Olfa 60 mm Endurance rotary blade, Olfa Splash cutter, and Olfa mat?  Due to shipping costs, this giveaway is limited to only the US and the prizes will be shipped directly from Olfa.

The giveaway starts Tuesday, August 28th at 12:15 am and runs through Saturday, September 1st at 8 pm (EST).  To enter, simply use the rafflecopter below. (If you are reading this post via e-mail, you may need to click over to the blog for the rafflecopter box to appear below).

(If you do not have an Instagram account, you can type in "no IG" into the box for an entry)

a Rafflecopter giveaway


Tuesday, August 21, 2018

Ruler Quilt

Check out the quilt that I made while reviewing two quilting products... I am calling it my Ruler Quilt as I made it with the Ruby Ruler and the Easy Piecing Grid.


1.  Easy Piecing Grid - 2" Finished Size by Ten Sisters Handicraft.  The pattern for the quilt I made was included in the package.

2.  The Ruby Ruler by Wise Craft Handmade


Disclosure:  Both of these products were provided to me at no cost, but all opinions are mine.

I used the Ruby Ruler to audition by fabrics, to make sure that pinks and peaches all had enough contrast with each other. The ruby color cancels out color, allowing you to instead focus on the value (the lightness or darkness) of the fabric.

Here is the Ruby Ruler with some of my fabrics (though it is much easier to see the value through the ruler in real life than my pictures).


I then used the ruler to cut my strips of fabric into 2 ½" squares. I felt that the ruler was very helpful to tell the real value of the different pinks and peaches I was trying to combine.

Once I had the squares all cut out, I used the easy piecing grid to put them together. Placing all of the squares in the correct grid location and then adhering them to the grid did take a while, but then the sewing went so quickly! I think that I had the full grid sewn (with perfectly matched seams) within 10 minutes. I loved watching each panel shrink.


I used the grid of the quilt top to quilt large wishbone and keep its spacing correct.  I love not having to mark quilts so using the piecing for the quilt design was a great time saver.


If you are interested to learn more information about the Easy Piecing Grid or the Ruby Ruler you can visit their websites:


Friday, August 17, 2018

50th Wedding Anniversary Quilt

My family recently traveled up to Delaware to celebrate my parents' 50th wedding anniversary party.  The party also served as a family reunion and it was exciting to see so many of my relatives together (my family is very spread out across the US).

For their anniversary gift, I made them a king sized quilt for their bed.  My mother like more modern designs and requested something in blacks, whites, and grays to go with their bedroom.

This is my first king size quilt I have made, an enormous 112" x 98".

Sorry for the lack of a better photo, taking pictures of a quilt this huge proved to be very challenging as it did not fit on my quilt stand.

I went through many different iterations and different designs including some designs with curves, paper piecing, and improv before I settled on a quilt based on equilateral triangles.  I thought that the triangles gave the design a modern and classic look.

I used my technique of Subtracting for Minimalism (I'll be teaching this method at QuiltCon 2019 and I also offer it as a 3 and 6 hour workshop for guilds) to come up with the design.  I wanted the affect of the middle having more white/gray prints and fading to black along the top and bottom.

Here was the rendering I made in EQ8 to figure out sizing and fabric placement:


I cut the triangles 8 ½" (the largest my ruler would go) to minimize the amount of triangles I needed (I still used over 200).  I thought that the larger triangles would scale nicely with the size of the bed.

I was able to use some of my special, hand printed fabrics in the quilt.  Here was a triangle made using some fabric that I created the screen print and printed in Karen Lewis's QuiltCon 2018 class.


Here is some fabric that I printed using a pre-made screen at a workshop hosted by my quilting friend Faye.


The piecing on this enormous quilt was actually not too bad because the larger triangles made the quilt top come together pretty easily.  I had planned on quilting the quilt myself, but admit that the huge size was really daunting.  I think that I would have had to take out all of the furniture from my family room just to have a space to baste the quilt :)

Right as I was working sewing the rows of triangles together, I received an e-mail from Jennifer Istok of Knotted Thread (Instagram, Etsy shop) about a Christmas in July quilting sale.  The sale offered an excellent pricing on quilting a Christmas themed quilt and an additional quilt so I jumped on it.  Jennifer said she could quilt my quilts in a tight time frame and she did an amazing job.  

Super quick, Jennifer had my parents' quilt back with the most amazing meandering feather quilting pattern.  The light gray thread blends in well on the white/gray prints and stands out on the black areas.


My parents loved their new quilt and I think that it looks great in their room :)

QUILT STATS
   Name: Parents 50th Anniversary Quilt
   Designed by: Cheryl Brickey using the Subtracting for Minimalism technique
   Size: 112" x 98"
   Fabrics: Assorted white, gray, and black prints on a Kona black background.
   Quilted by: Jennifer Istok of Knotted Thread
   Quilting Design: Meandering feathers


Thursday, August 16, 2018

Modern Plus Sampler Quilt ++ My Tribal Rows

I was excited to get right to the piecing for the Modern Plus Sampler this month by piecing the Tribal Rows.

There have been some wonderful Tribal Rows posted on the Facebook Group and on Instagram (#ModernPlusSamplerQuilt).  If you have a chance, please check them out :)

Here are some pictures of my Tribal Rows:


Want to join in?  You can find the Tribal Row instructions for August here and find out all about the quilt along here.