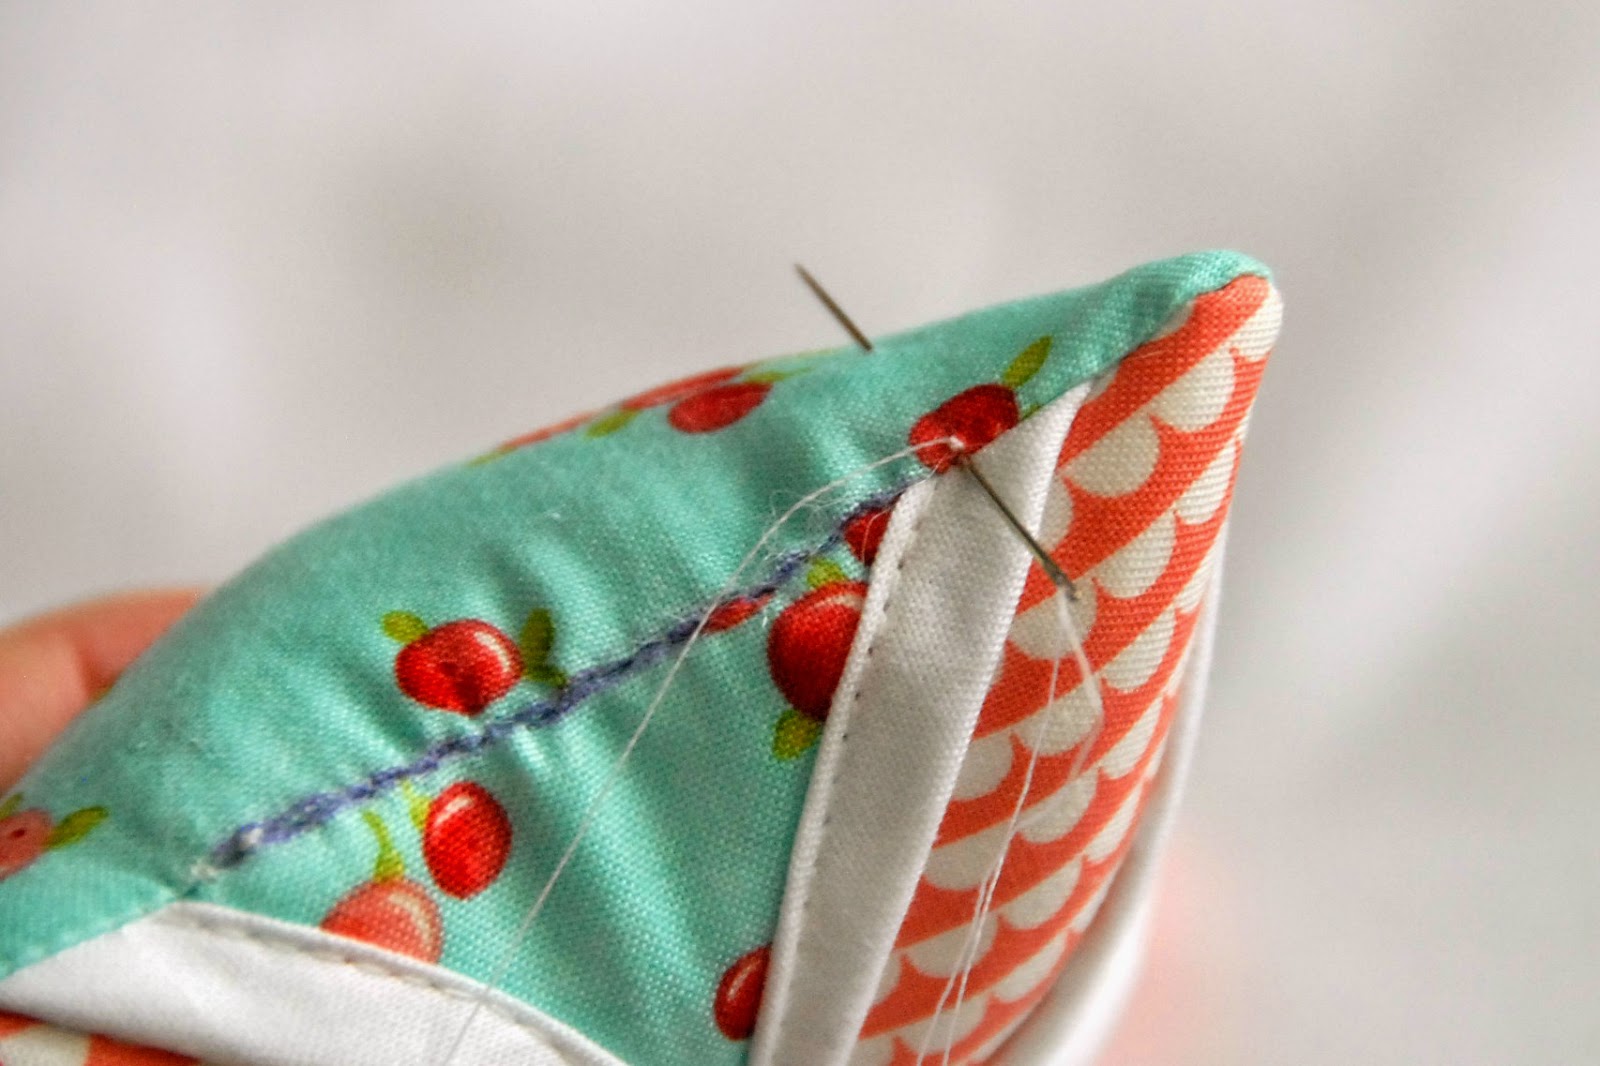
A hand stitch called a ladder stitch (also called a blind stitch) is used to sew an opening you left in a sewn object to turn it right side out (like pillows, pincushions, stuffed animals...). The stitch is almost invisible and forms a ladder like structure as you sew, hence the name. I learned the stitch from reading blogs and tons of practice so this tutorial incorporates my learnings and tricks to try to make the blind/ladder stitch as easy, invisible, and pain free as possible.
Start with your sewn object stuffed and ready for the opening to be sewn shut. In this demonstration, the object is a cathedral window pincushion stuffed with polyester stuffing.
1. Begin by marking (using a removable marking device), the stitching line to follow, starting from the sides of the opening and working towards the middle. Alternatively, you may iron the opening to make a crease to show where to sew, but I find making a sharp crease difficult (and find that it disappears half way through sewing) so I like to mark with the purple markers that disappear after a short time.
2. Thread the needle with the thread, form a knot at the end of the thread, and insert the needle into the side of the opening right where the stitching as ended. (For thread, I recommend a stronger thread such as a polyester thread or a cotton covered polyester core thread as they have a lower tendency to break than all cotton.)
3. Next (and this next step is the key to an invisible stitch), insert the needle into the opposite fabric directly across from where it came out of the first fabric. To achieve this, I pull the thread across the seam perpendicular to the marked lines and insert my needle right where the thread crosses over the marked line. Take a horizontal stitch along the marked line (my stitches are about an 1/8" of an inch) from one side of the opening towards the middle.
Here is the step again...
4. Repeat steps 3 and 4 about 4-8 times, then holding the fabrics together to close the partially stitched seam, pull the thread to tighten the partial seam. The more "stuffed" the item is, the more often you should tighten these partial seams as trying to tighten the thread across the entire seam at once may cause the thread to break (ask me how I know).
5. When you have done the blind/ladder stitch all of the way to the other side of the opening, make 2-3 knots to secure the thread, then insert the needle though the pincushion right next to the knit, and tug on the thread a little to bury the knot.
6. Trim the tail of the thread off (and remove the removable markings) and now you have a beautiful, almost invisible hand sewn seam!
Thanks!
I'm linking up to Sew Cute Tuesday @ Blossom Heart Quilts, Fabric Tuesday @ Quilt Story, Let's Bee Social @ Sew Fresh Quilts, Needle and Thread Thursday @ My Quilt Infatuation, and Sugar Bee Crafts.
I am also linking up to Link a Finish Friday, Whoop Whoop Friday, Thank Goodness Its Finished Friday, Fabric Frenzy Friday, Sewjo @ My Go Go Life, and Show Off Saturday @ Sew She Can.


Lovely tutorial and fantastic photos to accompany it. I have to admit that I am a bit odd in the fact that instead of tying knots at the beginning, I use a loop of thread - I put both ends of the thread through the needle. That way I only have to loop the needle through the thread to secure it at the start. It does mean that I have twice the thread as I am working, but I have found this to be really nice on some bindings and it means I can use the thread on hand that might be a bit more delicate without too many worries. Just a quirk of mine!
ReplyDeleteGreat job on your first tutorial! Lovely pictures as well...
ReplyDeleteA picture (or pictures in this case) is worth a thousand words. Great tutorial, thanks for sharing!
ReplyDeleteYou make it look so simple! I never thought of making a line first - this will help with my wonky stitching - thank you! Great meeting you through the New Blogger's Hop :)
ReplyDeleteThis has always been my favorite way to close a seam. Good directions.
ReplyDeleteNice tutorial, Cheryl! Drawing the lines first is a great idea. Thanks sew much for sharing!
ReplyDeletegreat tutorial, I hate hand sewing and have to look up how to do it everytime. I'm going to pin this for future reference.
ReplyDeleteI stitched 8 openings closed last night to complete coasters and wish I had seen this first to try it. My self-taught technique is similar, and I like the results, but this may be easier and I will give it a whirl. Beautiful photos, I just love that cushion!
ReplyDeleteWhat a great tutorial, Cheryl - I especially like the line drawn on because I tend to take a little more and a little more as I go and the end never looks like the start : P Great idea to stay on track!
ReplyDeleteThanks for the tutorial-- I really need to improve my hand stitching! This should help (I hope).
ReplyDeleteHopping over from Show Off Saturday Linky Party, Great post.. I love it.. Hop over to my blog I have a giveaway.. thanks for showing the ladder stitch clearly.. I have this pincushion in my bucket list..
ReplyDeleteGreat tutorial, Thank you for sharing.
ReplyDeleteGenius! I can't wait to try this!
ReplyDeleteJust found this and it is a really excellent tutorial, great pictures, thank you. :)
ReplyDeleteJust found this and it is a really excellent tutorial, great pictures, thank you. :)
ReplyDelete