Pages

Past Finishes

Thursday, January 2, 2025

Marble Mystery ++ Jan ++ Quilt Top Assembly


We made it! Welcome to the January set of instructions, the final instructions for the Marble Mystery Quilt! 

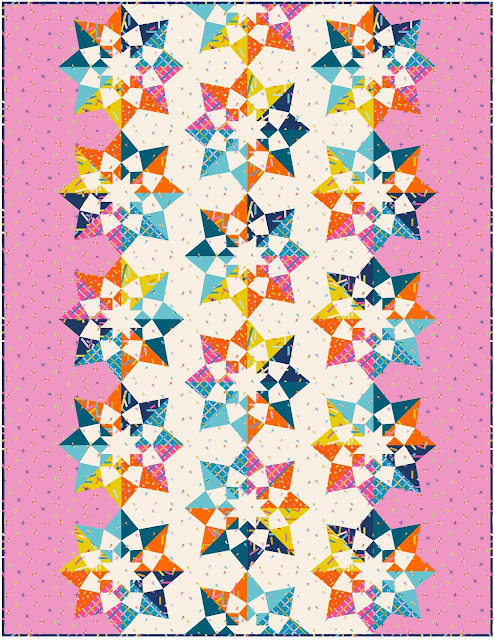
It's Quilt Reveal Time! 

I hope that you love the design! The reveal parade is not until March so there is plenty of time to get caught up or even start. 

Welcome to the January sewing instructions for the Marble Mystery Quilt, the tenth annual Meadow Mist Designs mystery quilt along!  This month we will be sewing our blocks and our quilt top.  

The Marble Mystery Quilt is a free quilt-along that will run from July 2024 through March 2025 to make a throw sized quilt (about 65 ½" x 65 ½") with a set of instructions posted the first Thursday of every month.  The quilt pattern is at an advanced beginner level containing basic piecing techniques (no applique, Y-seams, or paper piecing).

The directions and all of the other information relate dot the mystery quilt can always be found on the Marble Mystery Home Page.   


Easy to Print PDF Instructions

If you would like easy to print instructions for the November instructions, they can found as a free download through my shop:  


Block Assembly

FIRST BLOCKS

1.  Arrange the following units and pieces according to the illustration. 

4 first corner units 6 ½" x 6 ½"
4 first doublet units 4 ½" x 6 ½"
1 bg/A SiaS unit 4 ½" x 4 ½"

2. Sew together the units into rows, then sew the rows together, pressing the seams open or as indicated by the arrows, to make a first block 16 ½" x 16 ½". 

3. Repeat to make a total of 4 first blocks. 


SECOND BLOCKS

1.  Arrange the following units and pieces according to the illustration. 

4 second corner units 6 ½" x 6 ½"
4 second doublet units 4 ½" x 6 ½"
1 bg square 4 ½" x 4 ½"

2. Sew together the pieces and units into rows, then sew the rows together, pressing the seams open or as indicated by the arrows,  to make a first block 16 ½" x 16 ½". 

3. Repeat to make a total of 5 second blocks. 


Row Assembly

ROW A

1.  Arrange the following units and pieces according to the illustration. 

1 first block 16 ½" x 16 ½"
2 second blocks 16 ½" x 16 ½"
2 bg/D/bg triplet units 4 ½" x 16 ½"
4 bg rectangles 2" x 16 ½"

2. Sew together the units and pieces into a row, pressing the seams open or towards the bg rectangles, to make a row A 16 ½" x 62 ½". 

3. Repeat to make a total of 2 row A. 


ROW B

1.  Arrange the following units and pieces according to the illustration. 

2 first blocks 16 ½" x 16 ½"
1 second block 16 ½" x 16 ½"
2 bg/D/bg triplet units 4 ½" x 16 ½"
4 bg rectangles 2" x 16 ½"

2. Sew together the units and pieces into a row, pressing the seams open or towards the bg rectangles, to make 1 row B 16 ½" x 62 ½".


ROW C

1.  Arrange the following units and pieces according to the illustration. 

3 D/bg/D triplet units 4 ½" x 16 ½"
2 fabric D squares 4 ½" x 4 ½"
4 bg rectangles 2" x 4 ½"

2. Sew together the units and pieces, pressing the seams open or towards the bg rectangles, to make a row C 4 ½" x 62 ½". 

3. Repeat to make a total of 2 row C.


SASHING ROW

1.  Arrange the following pieces according to the illustration. 

4 fabric C squares 2" x 2"
3 bg rectangles 2" x 16 ½"
2 bg rectangles 2" x 4 ½"

2. Sew together the pieces, pressing the seams open or towards the bg rectangles, to make a sashing row 2" x 62 ½". 

3. Repeat to make a total of 4 sashing rows.


Quilt Assembly

QUILT TOP ASSEMBLY

1.  Arrange the following rows according to the quilt top assembly diagram:

2 row A 16 ½" x 62 ½"
1 row B 16 ½" x 62 ½"
2 row C 4 ½" x 62 ½"
4 sashing rows 2" x 62 ½"

2. Sew together the rows, pressing the seams open, to make to make the quilt top, which will measure about 62 ½" x 62 ½" (before borders are added).  


BORDERS

1. Sew together 2 bg strips 2" x WOF and trim to the height of the quilt top, about 62 ½", to make a side border 2" x 62 ½".  Repeat to make a second side border.

2. Sew borders onto the sides of the quilt, pressing seams open or towards the borders.  

3. Sew together 2 bg strips 2" x WOF and trim to the width of the quilt top, about 65 ½", to make a top/bottom border 2" x 65 ½".  Repeat to make a second top/bottom border.

4. Sew borders onto the top and bottom of the quilt, pressing seams open or towards the borders.  
The quilt top should measure 65 ½" x 65 ½". 


Finishing


1.  Make backing: Remove selvages from backing fabric, cut into 2 pieces approx. 74" x WOF and sew backing pieces together along the trimmed selvage edges using a   ½" seam, pressing the seam open.  Trim backing to approx. 74" x 74".

2.  Layer the quilt top, batting, and backing.   Baste and quilt as desired.

3.  Cut the binding fabric into 7 strips 2 ½" x WOF.  Trim off selvages and sew together end-to-end to make the binding.  Bind and enjoy your quilt!

Share Your Quilt
You can share your in-progress and finished pictures of your mystery quilt on the Meadow Mist Designs Facebook group: www.facebook.com/groups/MeadowMistDesigns/ and on Instagram and other social media using #MaltedMysteryQuilt and #MeadowMistDesigns.

The instructions to link up your quilt top / finished quilts for the reveal parade will be posted next week.